
Winter is coming and we know you boat lovers want to store it with care and love. This is why draining properly from the outboard motor is a must.
How to drain water from board motor?
Start by connecting a hose to the motor’s water intake. Turn the key after shifting to neutral. Start the engine after shifting to neutral. If there’s no stream, switch off the motor and repair the water pump.
Operate the motor for 5-ten min to rinse it out. Then switch off the water and engine. Flash out the water appropriately.
Let’s find out some easy detailed instructions to drain out the water properly. You’ll be done the job very neatly by following mentioned instructions.
Draining Water From Outboard Motor- 3 Easy Steps
We both know draining water is a compulsory step to keep your boat stored properly. You might face troubleshooting of triggered outboard without it.
Here are some easy steps to accomplish the task.
Step 1: Turn off the Motor and Remove the Key
Before starting work on the outboard motor, it’s important to turn off the motor and remove the key to prevent accidental starting. This helps to keep you and others safe while you’re working on the motor.
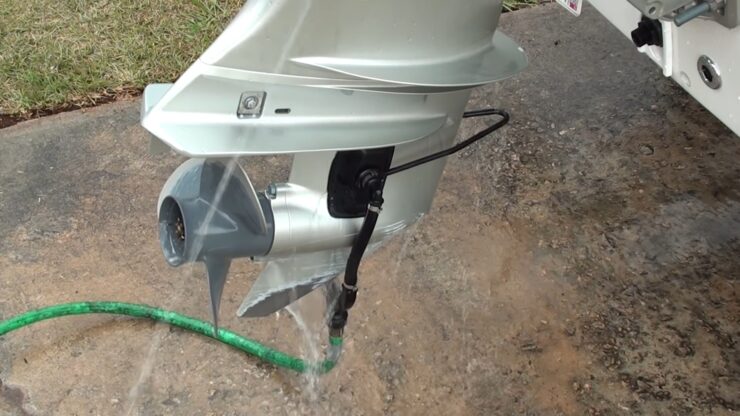
Step 2: Hose and Motor Flusher Muff Attachment
Before attempting to start your motor when submerged, see the instructions properly. Find out where your intakes are.
Check if they have built-in garden hose attachments by consulting your handbook. Motor muffs are required if you don’t have them.
When draining or running a motor dry, most manufacturers’ instructions are the same. In any case, it’s still a good idea to double-check the technique for your model before moving forward.
As long as the motor has a built-in hose connection, you may simply screw the hose into the motor. Set the water inputs on the sidewalls of the lower unit with the motor placed into the vertical position.
The hose nozzle should be screwed into one of the intake ports. You’ll likely find this recommendation in your owner’s handbook.
Purchase good quality motor muffs to make the process easier. It is important to winterize your boat properly.
To improve the seal, wet the muffs. It is common for boaters to hose out the muffs before connecting them to their engines. While the engine is running, the muffs might fall off if the seal isn’t strong enough.
Stay away from the propeller when attaching the muffs to the engine. You’ll need to line the water intake by sliding the muffs into place on the motor’s bottom unit before you can use it.
Ensure that the connecting rod is in front of the engine and on the opposite side of the propeller when positioning the muffs.
Keep the engine in neutral while draining the water, but watch out for the propeller while doing so. If the engine slides into gear with the connecting rod on the propeller side, it might cause injury or damage.
Attach the hose muffs to the garden hose. The nozzle on one of the muffs is removable, but the solid one is not.
Insert your water hose into it the one with the tip. Make sure the connection is secure and the muffs are properly positioned over the water intake on the engine.
Step 3: Putting the Engine Into the Transmission
Turn on the faucets and fill the pool with water. Turn on the water at the faucet after connecting the garden hose.
A water pressure setting may be specified by the user handbook. Setting it to half pressure is a common recommendation from several manufacturers.
You must not turn the key until the water has been switched on.
It’s time to put the motor in neutral and restart. Check to verify that the gearshift and the throttle are both set to the neutral position. Start the engine in neutral, and keep it there the whole time you’re driving.
If you need to put the engine in the drive to check the propeller’s performance, proceed with care and keep everyone and everything out of harm’s way.
Start up the engine. In order to turn on your engine, either insert the key or pull the starting cord as directed by the manufacturer. After turning the key, certain electric engines need you to press and release a button.
Perform a visual inspection of the motor’s water pump to ensure appropriate operation. A water stream should be coming out of the engine’s top. If your water pump doesn’t produce an overflowing stream, there’s a problem with it.
If there isn’t any flow, shut off the engine right away. Check the outflow tube for debris by inserting a tiny wire.
Check to check whether the issue has been resolved by restarting the engine. Otherwise, a water pump replacement is the only option in this situation.
Step 4: Motor Flushing
Start the engine and let it run for ten minutes, or as directed by the owner’s handbook. Most manufacturers advocate running the motor for 5 to 10 minutes while flushing it.
Whether you’re running the engine for any other reason, such as to see if it works, go ahead and let it run for as long as necessary.
Always keep an eye on the engine. Check the muffs to make sure they don’t fall off of the water intake while you’re swimming.
In most cases, a 10 to 15-minute run is all that is required, no matter what the workload.
Before shutting off the water, make sure to switch off the engine. Turn off the engine by closing the throttle or turning the key after around ten minutes.
Disconnect the engine before shutting the water off. Short-term exposure to the engine with no water may cause significant harm.
If you have built-in attachments, remove the hose by unscrewing the screws. After the water has been turned off, unhook the garden hose from the water intake on the muffs or the engine, coil it up, and store it somewhere out of the way.
In the event that you’ve been wearing ear muffs, take them off. Slide the muffs off of the bottom section of the motor if required.
After your next expedition, flush your engine with these at your convenient location.
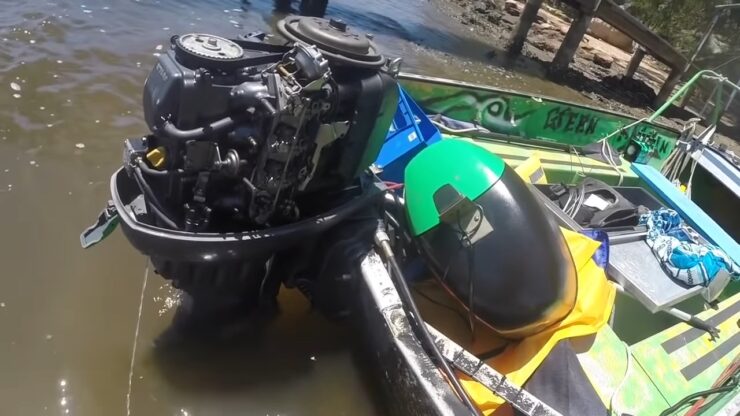
Before attempting to slant the engine, let the water run off. Allow the powerhead to dry for 30-60 minutes after shutting off the engine. Lift the motor into a slanted position after allowing it to drain.
To store the boat, you may either cover it and bring it inside your garage or a boat house. Before storage remove the gas from the boat tank properly. Then, you can put it away in another location of your choosing.
Step 5: Inspect the Motor
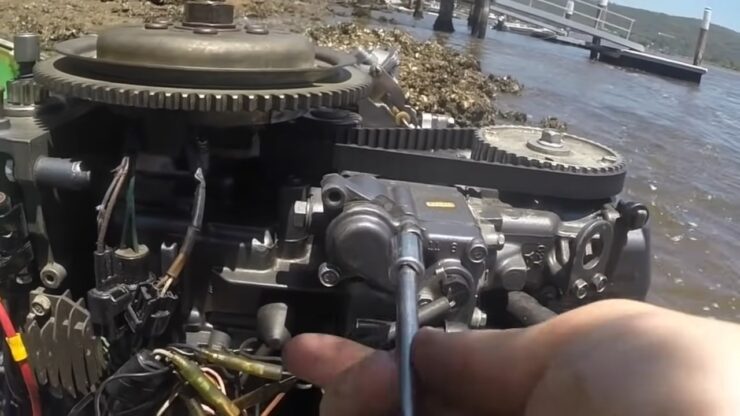
After the water has drained completely from the motor, inspect the motor to ensure that all water has drained out of the cooling system.
This helps to prevent water from freezing and potentially causing damage to the motor. Once you’re satisfied that all of the water has drained out, you can prepare the motor for storage or the next use.
FAQs
Do you have to drain water out of an outboard motor?
Many owners remove the cooling water from their outboards prior to winter storage in order to minimize frost damage.
Despite the fact that it may seem like “overkill,” flushing your engine with antifreeze is highly recommended.
During a strong freeze, this will keep any remaining water from freezing and causing harm.
What happens if you don’t winterize your outboard motor?
Ensure you don’t make the same errors twice. Whenever water freezes, it expands, which may cause harm to everything it’s stuck inside of.
This may happen if water gets into places that aren’t well-sealed.
Combustion engines are vulnerable to damage from corrosive waste, salt accumulation, and corrosion itself.
Do outboard motors have coolant?
Fresh water is used to cool the majority of marine inboard engines. Coolant is cycled via a heat exchanger. It is to keep the engine at the temperature specified by the thermostat. This is applicable to all of your motors.
Where should water come out on an outboard motor?
Water should come out of the telltale or water indicator located at the rear of the outboard motor, typically near the lower unit. This indicates that the water pump is working properly and cooling the engine.
Do outboads self drain of water?
Most outboard motors are designed to self-drain water from the cooling system when the engine is turned off and the boat is tilted or lifted out of the water.
However, it’s always a good idea to double-check that the cooling system is fully drained before storing the boat for an extended period. This helps prevent water from freezing and potentially causing damage to the motor.
How long does it take for water to drain from outboard motor?

The time it takes for water to drain from an outboard motor can vary depending on the make and model of the motor, as well as the angle of the boat when it is lifted out of the water.
In general, it may take several minutes for all of the water to completely drain from the cooling system of the motor.
It’s important to wait until you see no more water coming out of the telltale or water indicator before shutting off the motor and storing the boat.
Final Verdict
Hope we have explained in detail how to drain water from the outboard motor. It’s not rocket science so don’t get anxious.
Here’s a little tip for you- Drain petcocks can’t even be opened with a screwdriver. Remove the whole valve and replace it. The “wings” won’t break off and the draining will be much better.
I’m Liam Jackson, the proud owner and driving force behind KayakPaddling.net. Born somewhere in the expansive beauty of the United States, I’ve nurtured a lifelong passion for kayaking and fishing that has led me to explore the far corners of our nation’s waterways.