For those who love skiing, having a ski tow bar is a must. But we all know, it can be expensive to buy. And our budget may not be cut out for it.
So, the question arises, how to make a ski tow bar at home?
First, you need to determine the length and size of the bar. Then cut the pipe accordingly to the decided size. Drill holes to tie the rope to the bar. Assemble the bulkhead fittings into the rack and insert the pipe. Finally, secure the nuts and tie the rope to the tow bar.
If you are still unclear about the building steps, don’t panic. We will discuss each step and explain the whole process.
Sit tight and let’s go for it.
Materials Needed
To make a tow bar by yourself, you need to gather the materials needed. Not all of them might be available at your home.
Here, we’ll mention the materials below,
- Drill.
- ¼-inch drill bit and ⅝-inch spade bit.
- 1-inch bulkhead fittings. The bulkhead should have 4 holes. Get 2 of them.
- 1-inch schedule 40mm PVC pipe.
- ¼-inch X 20 X ¾ flat head wood screws. They need to be ⅝-inch long.
- Regular nuts. Get 3 of these.
- Saw for cutting pipes. You can either use a handsaw or a hacksaw.
- Shrink tube.
- Wrench for tightening.
- A rope.
- PVC cutter.
Making the Ski Tow Bar
Making a ski tow bar may seem difficult at first. But believe us, it’s not as difficult as you think it is. Here are the steps:
Step 1: Deciding the Ski Tow Bar Length
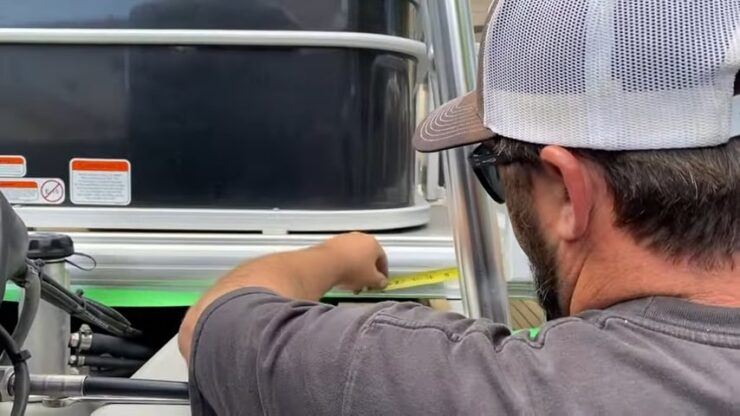
The length of the ski tow bar needs to be determined first. The span of the tow bar will depend on a few things. Like, the length of your board and how much distance you want to keep from the bar.
The length should be long enough to let the skier ride comfortably. We also need to make sure that there’s space for the skier to take turns.
Measure your board’s length. The ski tow bar needs to be at least double that length. It is advised to add a few more feet so that further adjustments can be made.
We have seen a few homemade ski tow bars in recent times. They each have different lengths for different user preferences.
Step 2: Sizing the Tow bar
The standard is to have a 1-inch schedule 40mm PVC pipe. Try to get bulkhead fittings that are made out of the same material as PVC pipe. This will help to put them together easily and decrease the chances of breaking up.
You can use both screws or bolts to put them together. Screws have an advantage here as they will not damage the pipe in usage.
Remember to get bulkhead fittings that have 4 holes. The size of them needs to be 1-inch. Also, check if the screws or bolts have the same diameter as the nuts.
Step 3: Cutting the Pipe
After you have determined the length of the ski tow bar, cut the PVC pipe according to it. To insert the bulkheads smoothly, we need the PVC pipe to be a little short.
Make sure to keep both sides of the pipe equal in height. This is essential for balancing the ski tow bar. Balance plays a big part in the skiing experience.
This is as simple as removing gas from the boat’s fuel tank.
Step 4: Making Rope Holes
Using a wrench, hold the PVC pipe pieces together and start making holes with a drill. We can use a ¼-inch bit for drilling holes here. The holes need to be a minimum of 10” apart on each side.
The hole spacing needs to be maintained as the rope will go through the holes. We can even use “V” shaped blocks to get a good position to drill. Be sure to make holes on both sides of the blocks.
Next is making a hole in the center of the blocks. We can use ⅝-inch spade bits for the job. But we need two of them.
An important factor here is to keep a minimum of 9” distance among the blocks. This is before we drill on the side of the blocks.
Keep in mind that the rope affects the overall experience. So, do this step properly.
Step 5: Adjusting Bulkhead Fittings in the Rack
Rotate the PVC Pipe and make an “L” shape keeping the length in mind. Do this by holding one end of the pipe.
Place washers over the bolts while ensuring that they fit with the bulkheads. Next, put them into the rack holes correspondingly.
Remember to place a nut and a washer. These need to be tightened with a wrench to increase safety.
The bulkhead fitting needs to fit properly. You will need to adjust or rotate the pipe so don’t make it too tight. Then, you need to follow the same procedure for the other end of the pipe.
Step 6: Putting PVC Pipe into Fittings
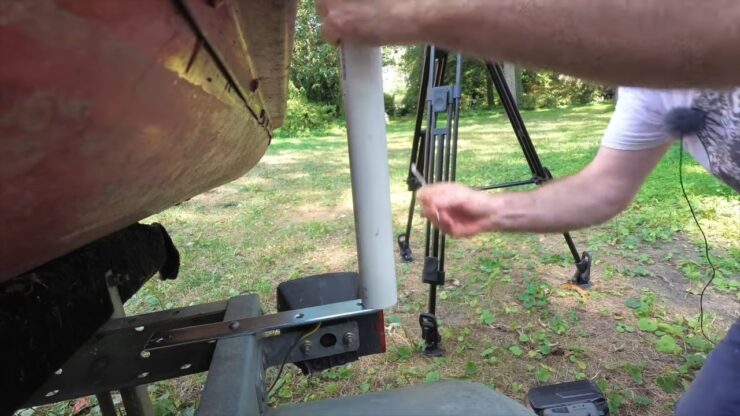
Get ahold of the other end of the pipe and fit it into the bulkheads. Then, add nuts for safety, and don’t tighten this one too much as well. As we might need to adjust the ski tow bar later on.
Place your ski or board 2” away from the tow bar. This will help us to get into position as a better angel.
Remember not to lay the board flat against the tow bar. That will decrease your speed.
Step 7: Shrink Tubing
After the bulkheads have been properly placed in the rack, it’s time for shrink tubing. The nuts will be secured by this process.
Remember to keep 1” out so we can shove it if we need to. We can simply use a lighter for shrinking. Just make them tight enough to keep the tubes in place.
Check if your snowboard or ski can smoothly slide between the ski tow bar.
Step 8: Tying the Rope
The next step is to tie down the rope. You can do this with zip or cable ties. Divide 2 pieces of 12-inch string and put one end on one side of the rack.
Do not get the strings over the bulkheads, they might come into contact with the skis.
Ensure that the rope is tightened properly. You can also use more cables for better safety.
The whole process is easy. If you can remove a boat steering wheel then this one’s a piece of cake.
Benefits of Making Your Own Ski Tow Bar
One of the main benefits of making your own ski tow bar is that you can tailor it to perfectly fit your skis. This means that you won’t have to worry about your skis slipping out of the tow bar, which can be a major safety hazard.
Another benefit of making your own ski tow bar is that you can choose the materials that you use to make it. This means that you can make sure that the tow bar is durable and will last for many years to come.
Finally, making your own ski tow bar is a great way to save money. Buying a ski tow bar can be quite expensive, so if you’re on a budget, making your own is a great option. Plus, it’s always satisfying to know that you made something yourself!
FAQ

Can You Pull a Tube With a Ski Tow Bar?
It has been advised by manufacturers to not tow tubes for safety reasons. Towing a tube may damage the boat and increase the risk of hurting the passengers. You should tow a tube only with tow bars that are tube-rated. Otherwise, the tow bar may break or come off altogether.
How to Tow a Skier?
The first rule is to watch the skier and act on his position. You have to see if the skier is ready to go or not. The boat needs to be fast enough to make the skier get on the water surface. But don’t go so fast that the skier is unable to hold on. With some practice and a spotter, you’re good to go.
Where Do You Attach the Ski Rope on a Boat?
The attachment points are the places to tie down the rope. One end should be tied down to the tow bar attachment point. The other end needs to be tied with the boat at its tying point. You can use a prong hold, a metal clip or even a slip knot depending on your requirement.
How much horsepower does it take to pull a tube?
The average boat needs 70-90 horsepower to pull a tube. In general, the bigger and heavier the tube, the more power you’ll need. If you’re trying to tow a large group of people on a big tube, you may need up to 150 horsepower.
Conclusion
This article should clarify the, how to make a ski tow bar question. You can now make your own bar and live your leisure days like you wanted to. It’s just a matter of keeping patience and following through with the steps.
If you are still pondering about it, maybe consulting a professional before building will help.
Happy skiing!
I’m Liam Jackson, the proud owner and driving force behind KayakPaddling.net. Born somewhere in the expansive beauty of the United States, I’ve nurtured a lifelong passion for kayaking and fishing that has led me to explore the far corners of our nation’s waterways.