Here is everything you need to know about anchoring your kayak, what things to buy, and how to use them for safe anchoring.
Anchoring a kayak for fishing requires some dos and don’ts that are a must to consider. The first thing on your priority list is safety because there isn’t anything in the world worthy enough to cost your life. There are so many things to consider before anchoring a kayak, for instance, the state of water.
You cannot anchor in fast-flowing water because it is dangerous. Other than that, some special equipment for such a purpose is necessary. Therefore, I considered it fitting to write an article on anchoring your kayak: what to buy & how to use.
Anchoring Your Kayak: What To Buy & How To Use
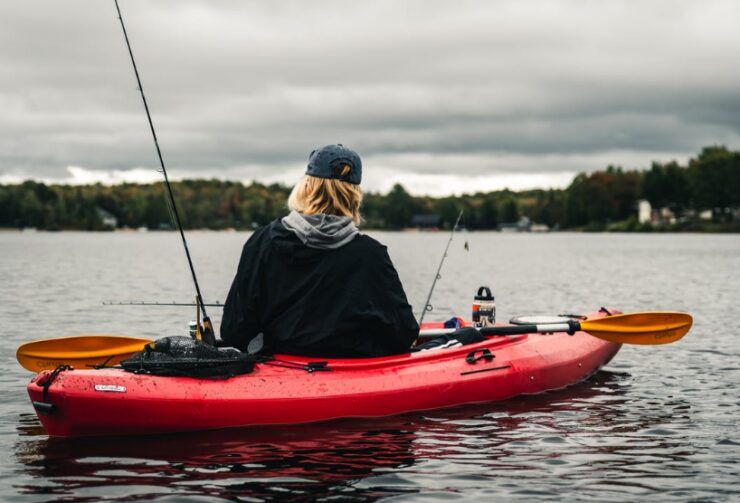
Sometimes you need to anchor your kayak to catch fish. A floating boat might spook away your targeted fish, making it difficult to catch them. Therefore anchoring comes in handy to wait till you are ready to catch. There are, however, some rules you need to be aware of before throwing an anchor. Not only that, you need some dedicated equipment that will allow you to anchor safely. The following section focuses on techniques of anchoring your kayak: what to buy & how to use it.
Material You Need For Anchoring
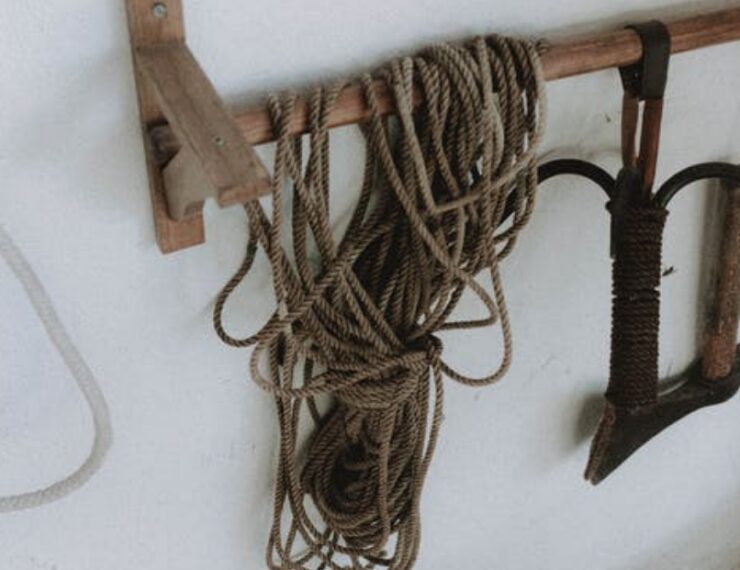
For safe and secure anchoring, on windy days, you will need an anchoring trolley kit which consists of almost all the essential equipment for anchoring. Here is the list of anchoring equipment you need to buy.
1. Anchor trolley chord
2. Pulleys and karabiners
3. Zigzag cleat
4. Trifold rivet fixings
5. Bolts and washers
6. Nut fixings
7. Nylon ring
8. Anchor trolley cleat
How To Use All The Components
Using all the equipment and components for anchoring correctly is more important than having them. You should be fully prepared for all the dangers and risks that come with anchoring a kayak. There are higher risks of capsizing your kayak, mainly in the faster currents and higher tides. Therefore, you need to be fully skillful about the task. Now that you have all the components, here is how to use them for safe and secure anchoring.
Where To Set The Anchor Trolley?
Before doing anything, set the anchor trolley, which is an extension line or a loop cord to the mid-ship. This keeps your kayak opposite to the wind and current, which is very dangerous as it can cause your boat to flip. Therefore, you need to set the anchor trolley either to the stern or to the bow of your boat so that it can be parallel to the current flow. Also, note that a kayak or boat is best stable along its length than its width.
Set The Anchor Trolley To The Boat
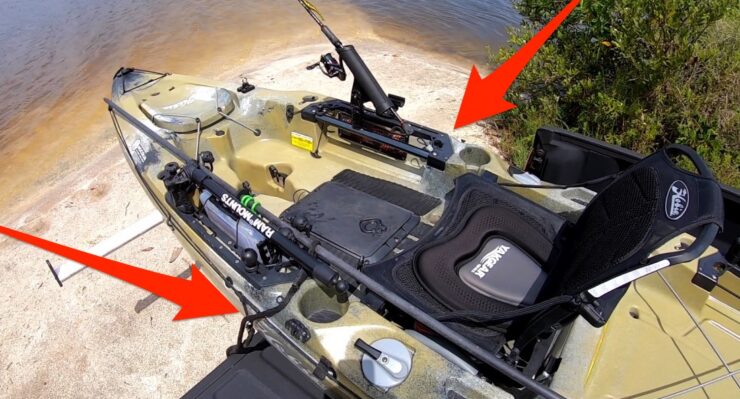
To install the anchor trolley system, you will need to screw the pulleys at least 12 inches from the stern or back of your kayak so that it can be functional. Before that, mark two points for the pulley screws and drill holes on those point markers. Screw the pulley and make sure you do that tightly to prevent them from loosening, which is an open welcome to danger.
After that, you need to install the pad eye by drilling two holes for the pad eye screws. Pad eye secures your trolley line from moving on the gunwale, which is the waterproof edge of the kayak’s hull. Pad eye can be installed using the screw and nut that comes in the kit. If you cannot use screws and nuts to bolt the pad eye, you will use the trifold rivet fixings for that purpose.
A precautionary step you would want to take is that you need to put silicone on the holes that you drilled for installing the pad eye. This step will make the installation secure and waterproof. Once you have installed the pad eye to the stern, the next goes on the bow. You need to perform the same procedure mentioned above.
Installing The Zigzag Cleat

Next is the installation process of a zigzag cleat. Now, if you don’t know, a zigzag cleat is a cleat that is used to lock and secure the anchor trolley and anchor line. Now, let’s get to the process. First, you need to mark the points where you will screw the zigzag cleat. After that, drill the two holes and apply silicone for a waterproof installation. Next, take the self-tapping screws and attach the cleat with the kayak.
Running The Rope Through The Installed Components
This step is the most important one, in which you need to thread the line through the components you have installed. First of all, take the rope to pass it through both the pad eyes installed close to the stern and the kayak’s bow, then the pulleys from above. Threading the string like this will give you two loose ends that connect with the nylon ring.
Fasten one end of the anchor trolley to the nylon ring using a fishers knot technique for a secure connection. Pass and set the rope in the zigzag cleat and connect the other end with the nylon ring using hog rings and then secure the connection with a shrink wrap for a tight and secure connection.
How To Anchor
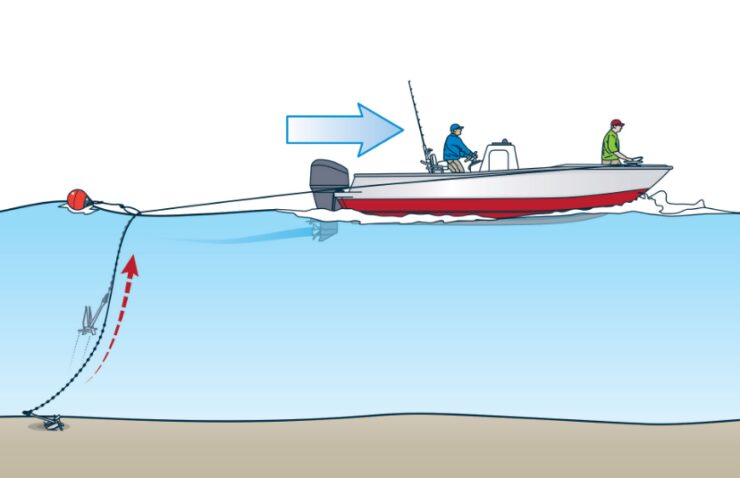
All the installation will allow your nylon ring to move any length you want. The anchoring line can be attached to the nylon ring. According to the direction of the current and wind, you will move the nylon ring, which will freely move the anchor trolley so that you can make a secure anchor. Once you have found your spot, you can easily lock the anchor trolley rope in the zig zag cleat.
This locking procedure will prevent your trolley line from moving to avoid accidents and mishaps. Lastly, you will tie the open end of the anchoring line with an anchor of your choice that the stake-out poles will hold. So this is pretty much everything you need for anchoring and how to use them.
FAQs
Is it dangerous to anchor your kayak from the mid?
It is perilous to anchor your boat from the mid because it increases the chances of capsizing; you might end up needing a rescue team. It is because any kayak or boat isn’t stable width-wise. They are best stable lengthwise; therefore, if you anchor them from midways, they are likely to lose their stability and flip.
How to anchor a kayak?
To anchor your kayak with the stake-out pole, you need to see the current and wind direction. You need to anchor the kayak from the stern or bow to ensure it remains stable and prevents capsizing. Moreover, you shouldn’t anchor your boat if the currents are extremely fast-flowing because that’s an open invitation to a disaster.
What kind of anchor do I need for my kayak?
The anchor you choose depends on the weight of your kayak and water condition. A 1 ½ to 3-pound grapnel anchor is the one used by most fishermen. A small anchor will suffice if you find calm waters with fewer to no currents. On the other hand, water with faster currents requires a heavier anchor, as mentioned above.
Final Thoughts
For profitable fishing, you will need to anchor your kayak to be able to catch your favorite species of fish. Anchoring isn’t as easy as you might think. It requires a remarkable skill level to make anchor your boat safely. It is because it can be life-threatening if anything goes wrong. You need proper components and some steps to follow, which I have mentioned in the above section.
Hi, I’m Jonathan Clayton, a seasoned writer with a deep-seated love for canoeing and kayaking. When I’m not navigating the waterways, I’m here at KayakPaddling.net, sharing my adventures and inspiring others to dive into the world of paddling.